DIY Brake Pad Replacement Guide
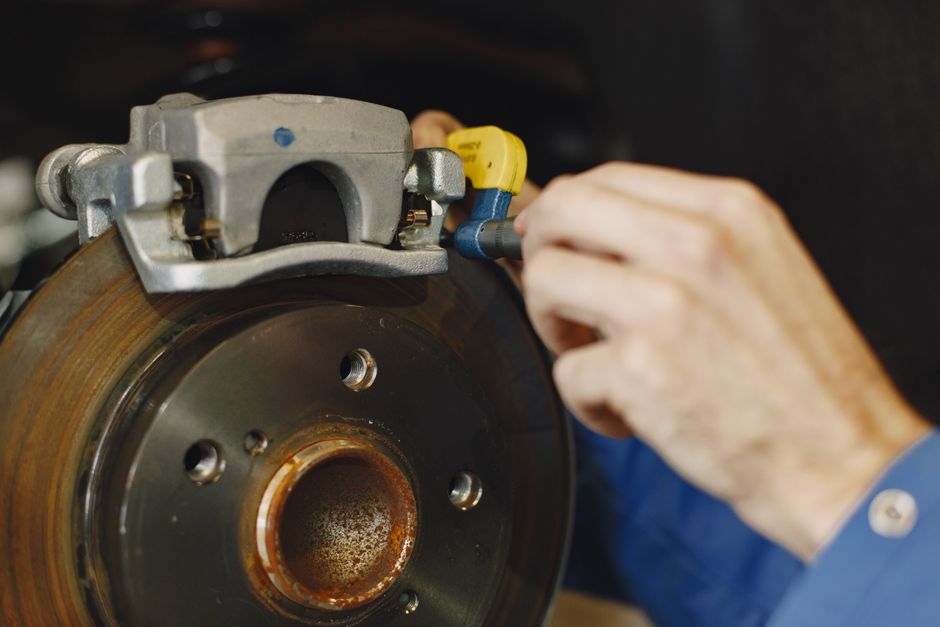
Replacing brake pads is a common maintenance task that can be performed by vehicle owners with basic mechanical skills. This guide provides a detailed overview of the process, including necessary tools, safety precautions, and torque specifications. It is intended for informational purposes and should be used in conjunction with a vehicle-specific service manual.
Brake pads are consumable components that gradually wear down due to friction. When they reach a minimum thickness, replacement becomes necessary to maintain braking performance. The procedure involves raising the vehicle, removing the wheels, compressing the brake caliper piston, and installing new pads.
Before beginning any work, ensure you have a clear understanding of your vehicle’s brake system and the specific requirements for your make and model. Always prioritize safety and consult a professional if you are unsure about any step.
Tools and Materials
Gathering the correct tools and materials before starting can streamline the process and reduce the risk of complications. The following list covers the essential items for most brake pad replacements, but always verify against your vehicle’s specifications.
- Floor jack and jack stands
- Lug wrench or impact wrench
- Socket set (metric and SAE as needed)
- C-clamp or brake caliper piston compressor
- Brake pad spreader tool (optional)
- Torque wrench
- Brake cleaner
- Wire brush or brake pad scraper
- Anti-seize compound
- New brake pads
- Brake fluid (if needed)
- Safety glasses and gloves
In addition to these tools, having a service manual for your specific vehicle is highly recommended. It provides exact torque values and procedures that may vary between models. Some vehicles may require special tools, such as a caliper piston wind-back tool for rear brakes with integrated parking brakes.
Consider using quality replacement pads that meet or exceed your vehicle manufacturer’s specifications. Motor Trust offers a range of brake components that are designed to match original equipment performance, though always verify compatibility with your vehicle.
Safety Precautions
Working on a vehicle’s braking system involves inherent risks, and neglecting safety can lead to serious injury or damage. Always park the vehicle on a level, solid surface and engage the parking brake. Use wheel chocks to prevent rolling, and never rely solely on a jack to support the vehicle; jack stands are mandatory.
Brake dust may contain hazardous materials, so avoid inhaling it. Wear a dust mask and safety glasses, and clean components with a dedicated brake cleaner in a well-ventilated area. Never use compressed air to blow brake dust, as it can become airborne.
Allow the brake system to cool completely before starting; brake components can reach high temperatures during operation. Work in a well-lit environment and keep children and pets away from the work area. If you are uncertain about any aspect of the procedure, consult a certified mechanic.
Proper disposal of used brake pads and fluid is required by law in many states; check local regulations for recycling or hazardous waste disposal. Additionally, always use the correct torque specifications to avoid damaging components or compromising safety.
Step-by-Step Brake Pad Replacement
The following steps outline a typical brake pad replacement for a disc brake system. Note that some vehicles may have variations, such as drum brakes or electronic parking brakes, which require different procedures.
- Loosen the lug nuts on the wheel you will be working on, but do not remove them yet.
- Raise the vehicle using a floor jack and secure it with jack stands at the manufacturer’s recommended lift points.
- Remove the lug nuts and the wheel to expose the brake caliper and rotor.
- Inspect the caliper, rotor, and brake lines for signs of wear or damage. If the rotor is scored or below minimum thickness, it may need resurfacing or replacement.
- Remove the caliper bolts (often two) using a socket wrench. On some vehicles, you may need to remove a spring clip or retaining screw first.
- Lift the caliper off the rotor and suspend it with a bungee cord or wire to avoid stressing the brake hose. Do not let it hang by the hose.
- Remove the old brake pads from the caliper bracket. Note the position of any shims or anti-rattle clips.
- Clean the caliper bracket and slides with a wire brush and brake cleaner. Apply a thin layer of high-temperature grease to the slide pins if applicable.
- Compress the caliper piston using a C-clamp or piston compressor. Open the brake fluid reservoir cap to relieve pressure, and monitor fluid level to prevent overflow.
- Install new brake pads with any shims or clips in the correct orientation. Apply a small amount of brake pad grease to the backing plate edges (not the friction surface).
- Reinstall the caliper over the new pads and tighten the caliper bolts to the specified torque. Refer to your service manual for exact values.
- Reinstall the wheel and hand-tighten the lug nuts. Lower the vehicle and tighten the lug nuts to the specified torque in a star pattern.
- Pump the brake pedal several times to seat the pads against the rotor. Check the brake fluid level and top off if necessary.
- Test the brakes at low speed in a safe area before driving at normal speeds.
This sequence is general; always follow your vehicle-specific instructions. After installation, avoid heavy braking for the first 200 miles to allow the pads to bed in properly.
Torque Specifications and Best Practices
Torque specifications are critical for safety and component longevity. Over-tightening can strip threads or warp rotors, while under-tightening can cause bolts to loosen. Always use a calibrated torque wrench and refer to your vehicle’s service manual for exact values.
Common torque values for brake components vary widely. For example, caliper bracket bolts may range from 30 to 80 ft-lbs, while lug nuts typically require 80 to 100 ft-lbs. Never guess; incorrect torque can lead to brake failure. If you lack a torque wrench, many auto parts stores offer loaner tools.
When applying torque, tighten bolts in a star or crisscross pattern where multiple fasteners are used. This ensures even clamping force. Use anti-seize on lug studs sparingly, as excessive amounts can affect torque readings.
Record the torque values and any part numbers for future reference. After the first 50 miles, recheck the lug nut torque and inspect for leaks or unusual noises. If any issues arise, consult a professional immediately.
Always prioritize safety over speed. A properly executed brake job can enhance vehicle safety, but mistakes can have serious consequences.
Post-Replacement Checks and Maintenance
After replacing brake pads, perform a series of checks to ensure everything is functioning correctly. Start by testing the brake pedal feel; it should be firm and not spongy. If the pedal feels soft, there may be air in the system, requiring bleeding.
Listen for unusual noises such as squealing or grinding. Some squealing may be normal during the break-in period, but persistent noise could indicate improper installation or defective pads. Check for brake fluid leaks around the caliper and lines.
Drive at low speeds and perform several moderate stops to bed in the pads. Avoid aggressive braking for the first 200 miles. After this period, gradually increase braking intensity. Monitor brake performance and pedal feel regularly.
Inspect brake pads every 12,000 miles or during tire rotations. Replace them when the friction material is less than 3mm thick. Also check brake fluid levels and condition; brake fluid absorbs moisture over time and should be replaced per manufacturer recommendations.
Keeping a maintenance log can help track brake wear and identify patterns. If you notice uneven wear, it may indicate a stuck caliper or other issues that require professional attention.
While DIY brake pad replacement can be rewarding, it is not suitable for all vehicles or individuals. If you are unsure, seek assistance from a qualified mechanic. Motor Trust encourages safe practices and provides resources to support your maintenance efforts, but assumes no responsibility for outcomes.